There's no way to load your own samples onto MiniFreak?

Hi Ullah! I’m the OP on this thread, and I just bought your CSI. Question: someone earlier in this thread said that they had perused your code and they thought that any usage of custom samples through your tool would “break” any presets that use factory samples?

Can you elaborate on that-is that what I can expect? It’s not necessarily a disqualifier to me using your tool; I’d just actually like to know what to expect by using it.

Hey Deepmojoman,

Thanks for trying! Just finished work and enjoying the beer you bought! Cheers!
Has everything worked out for you?

I’ve never encountered problems with factory presets that use sample engines (or grain, frozen, etc.).

But of course, when manipulating, deleting, or renaming those factory samples in the Minifreak V directory, you could break a preset if you’re not careful.
That is why I recommend pulling a fresh backup before you start exploring.
Btw, duplicate your Minifreak V file directory and save your Minifreak backups in an external folder. Just in case.

My guess regarding the comment is that the person you mentioned was confused by the Freak’s synchronization method. When you connect your Freak to the software, you are able to access all presets in the software; it will play and show them on the device, BUT it does not sync all played presets automatically. You have to move them manually to the Freak or into a backup.

I just rechecked to see if there are any problems with factory sample presets, only to realize that most of the current presets in MfV are not loaded onto my hardware.

Greetings from Berlin !

1 Like

Hi

I put back my comment here:

I’m not a MiniFreak expert you’re quite right.
But if I understand it well, the tool overrides the factory samples that are used in factory patches, it will completely “break” them (breaking as changing drastically their sound).
Is it a problem ? It’s not if you don’t use factory patches or if you don’t care about changing their sound.

Honestly, kudos to you for making such a tool. I personally love seing our community making great stuff like this.

Cheers !

1 Like

Haha,

sry, was not aware that this was related to your post :slight_smile:

To clarify, the tool just creates samples in this strange (you know better) “.raw12b” format. Nothing is being overwritten automatically.
Users just have to place this created files manually in the Minifreak V sample folder. There they are coexistant with the factory samples nothing has to be overwritten. On hardware, after synced the device, you can just select it from the list with Shift+ Type combo as usual. In Software it is shown in the List.

1 Like

Ok ! Very nice.

I may have misunderstood something then.
I’ll try to take some time to dig a bit more and understand better what you did here :slight_smile:

In any case, respect !
And thanks for taking some of your time to do such tool.

2 Likes

Quick question: in your app, there is a blurb which instructs the user to place their converted sample files into this hidden directory: Library/Arturia/Samples/MiniFreak V/Samples.

But my directory is organized a bit differently: firstly, I have all my Arturia samples on a disk other than the startup disk-although I have placed an alias for that folder into the first level of Library (it is entitled “Arturia Samples”, not “Arturia”). Then it goes as follows: Arturia/Samples/MiniFreak V, and then inside MiniFreak V is: Factory, and inside Factory is two folders named “Samples” (where all the factory samples reside), and WT (the wavetables).

So the question is: should I create another folder on the same level as the “Factory” folder entitled “User”, and put my samples in there? Or what? How should I treat this situation?

Ok , an update: I went ahead and just tried putting my converted sample into the Factory sample folder (in reading your instructions more closely, I gathered that this is what is supposed to happen). And it actually worked-sort of.

When playing a patch I had created with the new sample, it worked perfectly-in MiniFreak V. But when I tried playing it on my actual hardware Minifreak, I noticed that both the new converted sample played, ALONG with whatever sample the hardware synth decided it had displaced, in the order it was expecting to encounter the samples. So, I’d always hear a double sample: my new sample, as well as a factory sample.

So, how would I remedy this?

I’ve perused your last comment on this thread a bit more carefully, and I’ve noticed that you’ve said that after placing your custom sample into the correct folder, you have to re-sync your hardware unit to MiniFreak V. That could mean a few things in minds eye: un/relink the hardware? Do a new backup? At any rate, when I sit down again, I’ll sift through the possibilities and see what happens.

I’ll keep everyone posted. Thanks again.

Ok, tried in a few different ways, and still couldn’t find a way to “sync” this sample onto my hardware.

So, I need help: how do I do this?

Hey hey,

this is a good example for the difference between proper software development and a cheap, vibe coded hack, not officially supported.

However, its not that complicated. Most properly you worked in the wrong order.

Preparation

  • Hardware: MiniFreak should be on your desk and connected to power, but switched OFF.
  • Connection: Have your USB cable ready, but unplugged from the computer.
  • Software: Ensure the MiniFreak V standalone application and all DAWs are closed.

Step-by-Step Instructions

  1. Restart your Computer: This ensures that no background MIDI services or VST hosts are utilizing MiniFreak V files.
  2. Generate your Sample: Use the HTML CSI tool in your browser (Chrome recommended). Export your file as [yoursamplename].raw12b to your desired directory.
  3. Locate the Library Folder: Navigate to the Arturia Samples directory.
  • Mac Default: /Library/Arturia/Samples/MiniFreak V/Factory/Samples/Factory
  • Windows Default: C:\ProgramData\Arturia\Samples\MiniFreak V\Factory\Samples\Factory
  1. Deploy the File: Copy and paste your [yoursamplename].raw12b into this directory.
    Note:* Do not delete, rename, or edit existing factory files. Ensure your custom file has a unique name.

  2. Test in Software: Open the MiniFreak V standalone application. Initialize a patch, set the oscillator to the Sample Engine, and verify that your custom sample plays correctly using the internal software keyboard.

  3. Sync to Hardware: * Power ON the MiniFreak hardware and connect the USB cable to the computer.

  • In MiniFreak V, click the “Link to MiniFreak” button.
  • A modal should appear indicating that factory samples are being transferred to the device.
  1. Finalize: Once the transfer is complete, click Unlink. Power off the MiniFreak hardware and disconnect the USB cable.

  2. Hardware Verification: Power the MiniFreak hardware back on. Initialize a patch, select the Sample Engine, and hold Shift while rotating the Select encoder to find and play your new sample.

  3. Enjoy the sound, open a beer and dream of the day when official developers will implement this without the hassle… :wink:

Thanks for getting back to me.

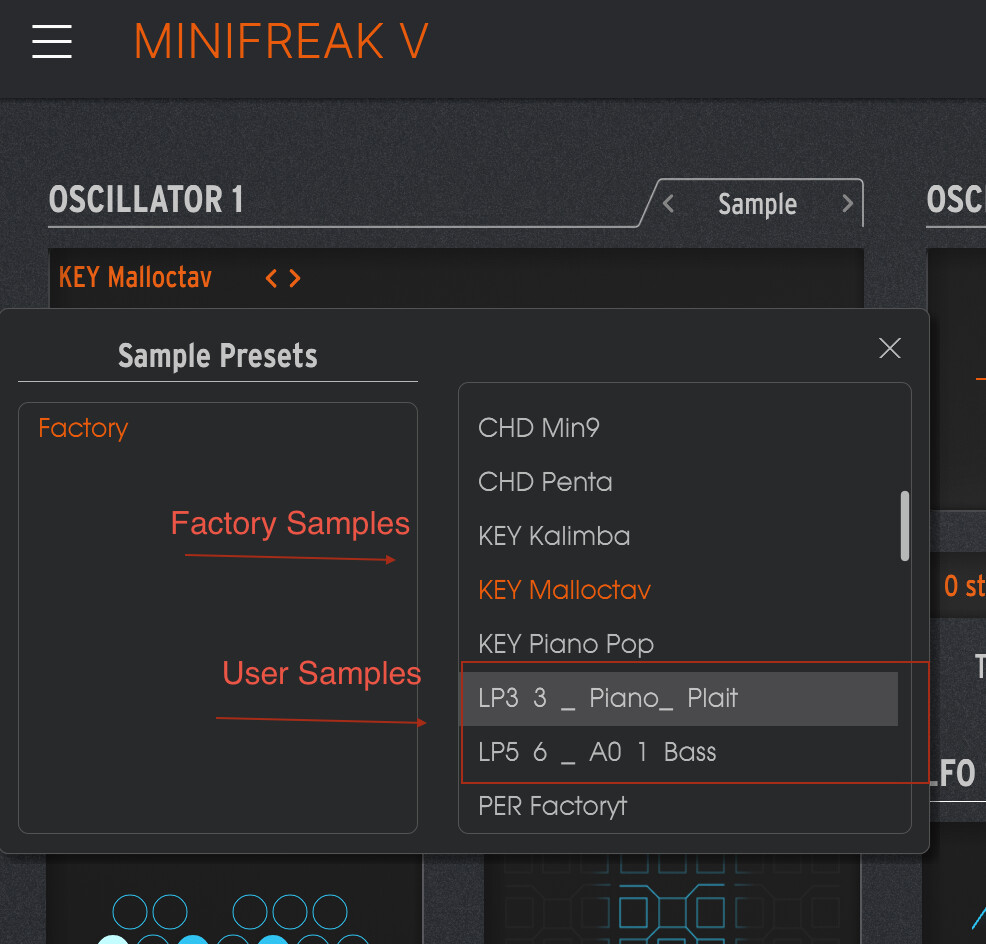
So, unfortunately it’s still sort of only half working: as soon as I saw your last post, I did EXACTLY as you asked: restarted, prepared the sample, tested it in MF V, and only then did I turn the hardware MF back on and re-connected the USB. Although it didn’t happen in exactly the order that you predicted, as soon as MF V saw the hardware, it immediately started to sync the samples (this occured before I even pressed the “Link to MiniFreak” button.) And when it was finished, I found that it had succesfully brought over the sample that I had made last night. It works perfectly as a synth oscillator, in both MF V AND with the hardware synth.

But: as you instructed, I had also made a sample this morning ("Generate your Sample: . . " just to be thorough), and before turning on the hardware synth, I had, as you put it, “Deployed the File”, putting this sample it into the correct directory.

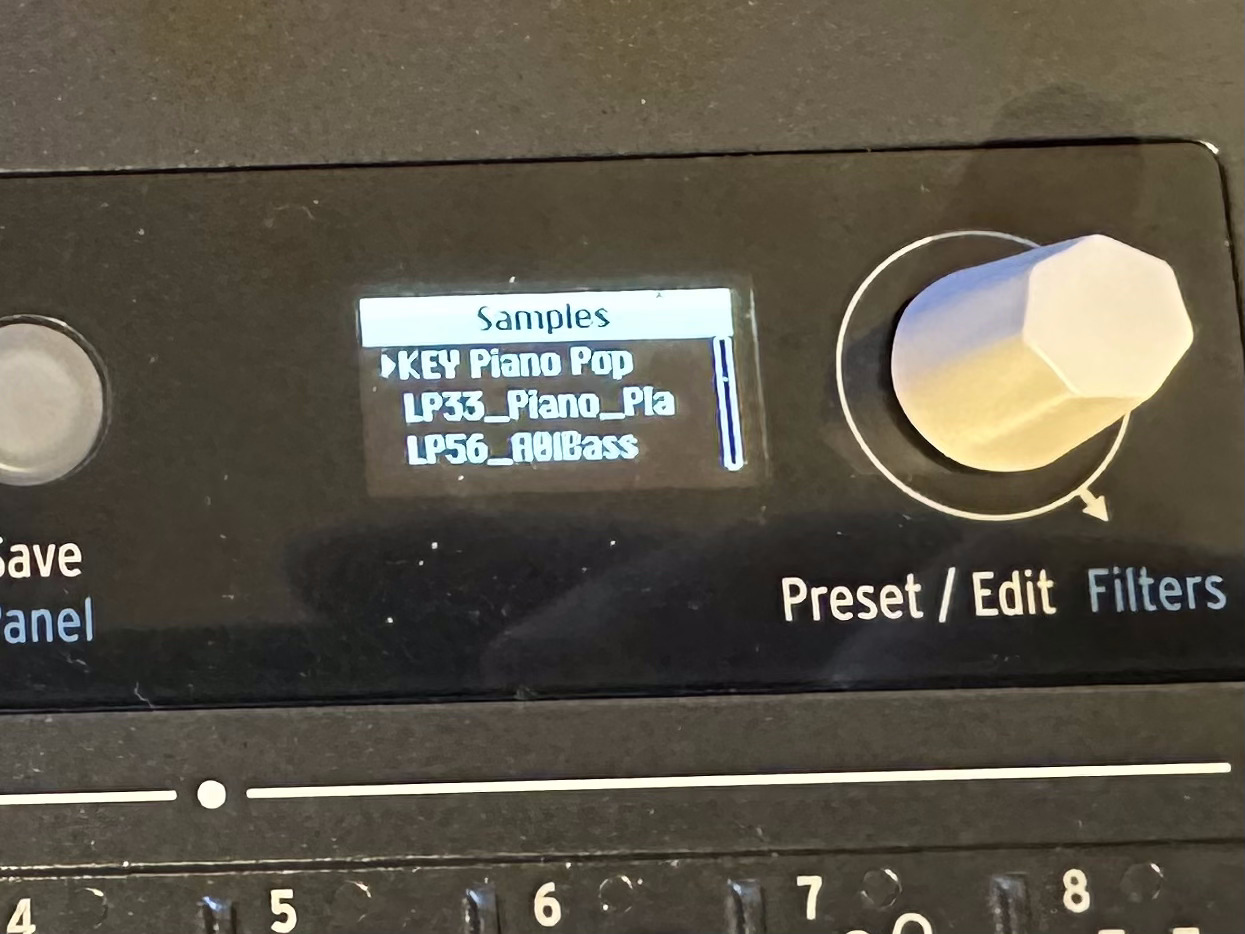
And during the syncing process, even though MF V had synced the sample I’d made last night perfectly, as far as the new sample I’d made this morning goes, MF V did in fact seem to place some sort of sample-or sample proxy-into the hardware, with the correct name of this newly made sample. But when I try to use it as an oscillator, the hardware reacts just as it did last night: this new sample is selected, but the hardware actually ignores it and instead plays one of the samples immediately adjacent to it-either the one immediately above or the one immediately below.

I’ve tried to redo the process, again following your instructions to the tee, but since first being able to trigger the “sample sync” process, following your instructions this morning, I have not been able to duplicate this process. No matter how many times I have re-traced my steps and gone through your instructions again and again, I have not been able to re-trigger “sample sync”

So, I’m stumped at the moment. I wish that I could get rid of the erroneous sample that has been transferred onto the hardware synth, but it doesn’t look like you’ve built a means of erasing samples from the hardware synth-only a procedure to copy samples onto it.

So, if you have any insights or solutions, then I’d like to hear them. If not, then it looks like I might just have to wait some more for Arturia to finally make good on their promise :confused:

It’s too bad, too, because the sample that did make it over to the hardware unit sounds great, and I can already have a lot of fun with it. So, thanks for that one, at any rate.

If you’re still hitting a wall, I had a similar issue after accidentally copying a corrupted file into the MiniFreak V sample folder. The solution was to wipe the hardware directory and start fresh.

1. Backup your Presets First, back up your MiniFreak hardware presets. Check the manual if you aren’t sure how, but make sure your unique sounds are safe before moving forward.

2. Backup your Software Banks Head to the MiniFreak V directory and copy your backup folder to a safe location.

  • Mac Default Path: /Library/Arturia/MiniFreak V/resources/HardwarePresets/MiniFreak Banks

If you ever need to reinstall, you can just drop these backups back into this folder to restore them later.

Attention: The next steps will definitely wipe your MiniFreak’s files.

3. Format the Hardware Filesystem

  • Power on your MiniFreak.
  • Press and hold OSC Select + Filter Type for a few seconds.
  • When the menu appears, use the Preset/Edit Encoder to navigate to “Format FileSystem”.
  • Press the encoder to confirm.
  • Now restart your Freak.

4. Clean up the Sample Directory Go into the MiniFreak V sample directory and make sure only the original factory samples are there, delete any custom ones you created for now.

5. Re-Sync Start MiniFreak V and click “Link to MiniFreak.” The synchronization should start again. This will take a bit more time as all factory samples have to be transferred back to the hardware.

6. Try again: but Follow the order mentioned earlier! From here, start again with the CSI Tool and paste your custom sample as described in the previous steps.