Is the setup correct?

Hello everyone, I just purchased Arturia minifuse 2 and installed it on my laptop.
(Old hp laptop, 8ram, win10, Ableton)

Since I am total new to music production, I was wondering if I installed it correctly.

As you can see in the pictures*, in Ableton preferences, it shows up only if I chose ASIO and under that, the Minifuse ASIO DRIVER. Is this normal?
If yes, what other settings should I arrange?

(At this moment I have nothing else connected on my laptop apart from the minifuse2. In the next days I will add the minilab3 on my laptop and headphones and microphone on minifuse2.)

As you can see in the pictures* below, it is running on my laptop the MINIFUSE ASIO Control Panel and Audio Control (which came with the laptop, I suppose it is a HP laptop program for the audio. Should I uninstall this HP program?)

In the Minifuse ASIO Control panel, as you can see:
-the buffer size is set to 512 samples,
-safe mode is checked,
-Asio status not active,
all these were set by default. Should I change something and why?

Thank you for your time.

*Ps. I cannot upload more than one picture,since I am new to this forum, it doesn’t let me upload more pictures on of my system on this post.

HI @Art5 and welcome to The Sound Explorers Forum!

In a few words, yes you should select the ASIO driver for your MF2, it bypasses windows audio and will provide a much more robust experience for you. ASIO has been around for some years now and the vast majority of us Windows users that make music use it.

Set the buffer size as low as you possibly can without getting crackles, pops etc on your system when using virtual synths/effects etc. You may find that you have to increase this or ‘freeze’ some channels and instruments if the ‘latency’ becomes too great for you. Ideally you want under 10ms ‘round trip’ latency.
Latency is the amount of time it takes the computer and soundcard to accept an input signal, process whatever it needs to, be it play a synth or process/record audio and then return the sound to the output, in this case your headpones.
Please note that this is a VERY overly simplified explanation of latency, but will suffice for this post.

As you’re only using one audio input for your mic, just pick the minimum number that you can, you can increase this in future if you need to.
Keep ‘safe mode’ selected, i’m assuming this is to prevent dropouts in audio being recorded in the event of an ‘ASIO over’.
Pick whatever sample rate you wish, higher ones will give higher quality, CDs are 44.1KHz, DVD is 48KHz, but with modern analogue to digital converters, most people won’t hear any difference. You will get slightly lower latency with higher sample rates though of course.

You can also choose whether to use your MF2 for your sound in windows too, which is what your later pics show.
Some people choose to use the onboard sound of their PC for windows and their external interface for purely DAW purposes and some choose to use their external interface for both. You’ll likely get MUCH better sound quality if you do use your MF2 for both though.

Hit The official Arturia YouTube channel for ‘how to’ videos and more, as well as other channels, and don’t forget to subscribe to our Newsletter to be the first to know about the latest from Arturia.

HTH!

Thank you very much for your help. I will check your info and get back!
Many thanks. :slight_smile:

I’m back with the settings:

I set the buffer size to 256 from the default 512
and I noticed that the latency went to 8.50 and 9.83 while when it was at 512, the latency was over 11.50 if I remember correctly.

So is this change correct? The fact that I set it to 256 sacrifices sound quality for better latency?

In the last photo, after I installed a midi keyboard (I purchased the minilab3), I noticed that Ableton didn’t automatically ‘scan’ it,

however, I found it in the corresponding tab as MiniLab and not as MiniLab3 in the CONTROL SURFACE tab of Ableton,
and it appeared as Minilab3 Midi in the Input tab. Is this the correct way to appear-register?

What should I select in the ones I have put the arrows (start stop sync,
takeover pickup) and in the ones I have in the circle, do I have to change something?

Thank you


HI again @Art5

Ok, something i feel i should say is that it’s wroth you, and indeed pretty much essential, that you spend a little time, or perhaps a fair bit of time; finding out about certain things such as ‘latency’ buffers’ etc as you WILL be seeing these things rather a lot.
Spend some time hitting the manuals for your equipment, it WILL reward you in the long run!
It’s not really something that’s approachable in a ‘just follow steps A,B,C’ etc fashion as things do and WILL go wrong for you at times and you can guarantee it will be at times when there’s no one around to help, ask anyone on here, or any other music related forum and you’ll get the same answer.
It’s about understanding your system enough to be able to cope with these things when they do happen.

Ok, that over with
 The buffer, in an over simplified explanation, is essentially the chunks of data that your system deals with, the smaller the buffer size the lower the latency you will experience, the two are related, along with ‘sample rate’.
This is something you should spend some time online researching and is common to all digital recording systems.

You should have as lower buffer size as your system will handle as this will affect the amount of time it will take an audio signal to enter your interface, we’ll say your mic for this instance, then for it to be transferred to your computer, the computer to do what it needs to ; then for the the computer to send it back to the interface and the interface to send it to its output, speakers or in this case headphones.

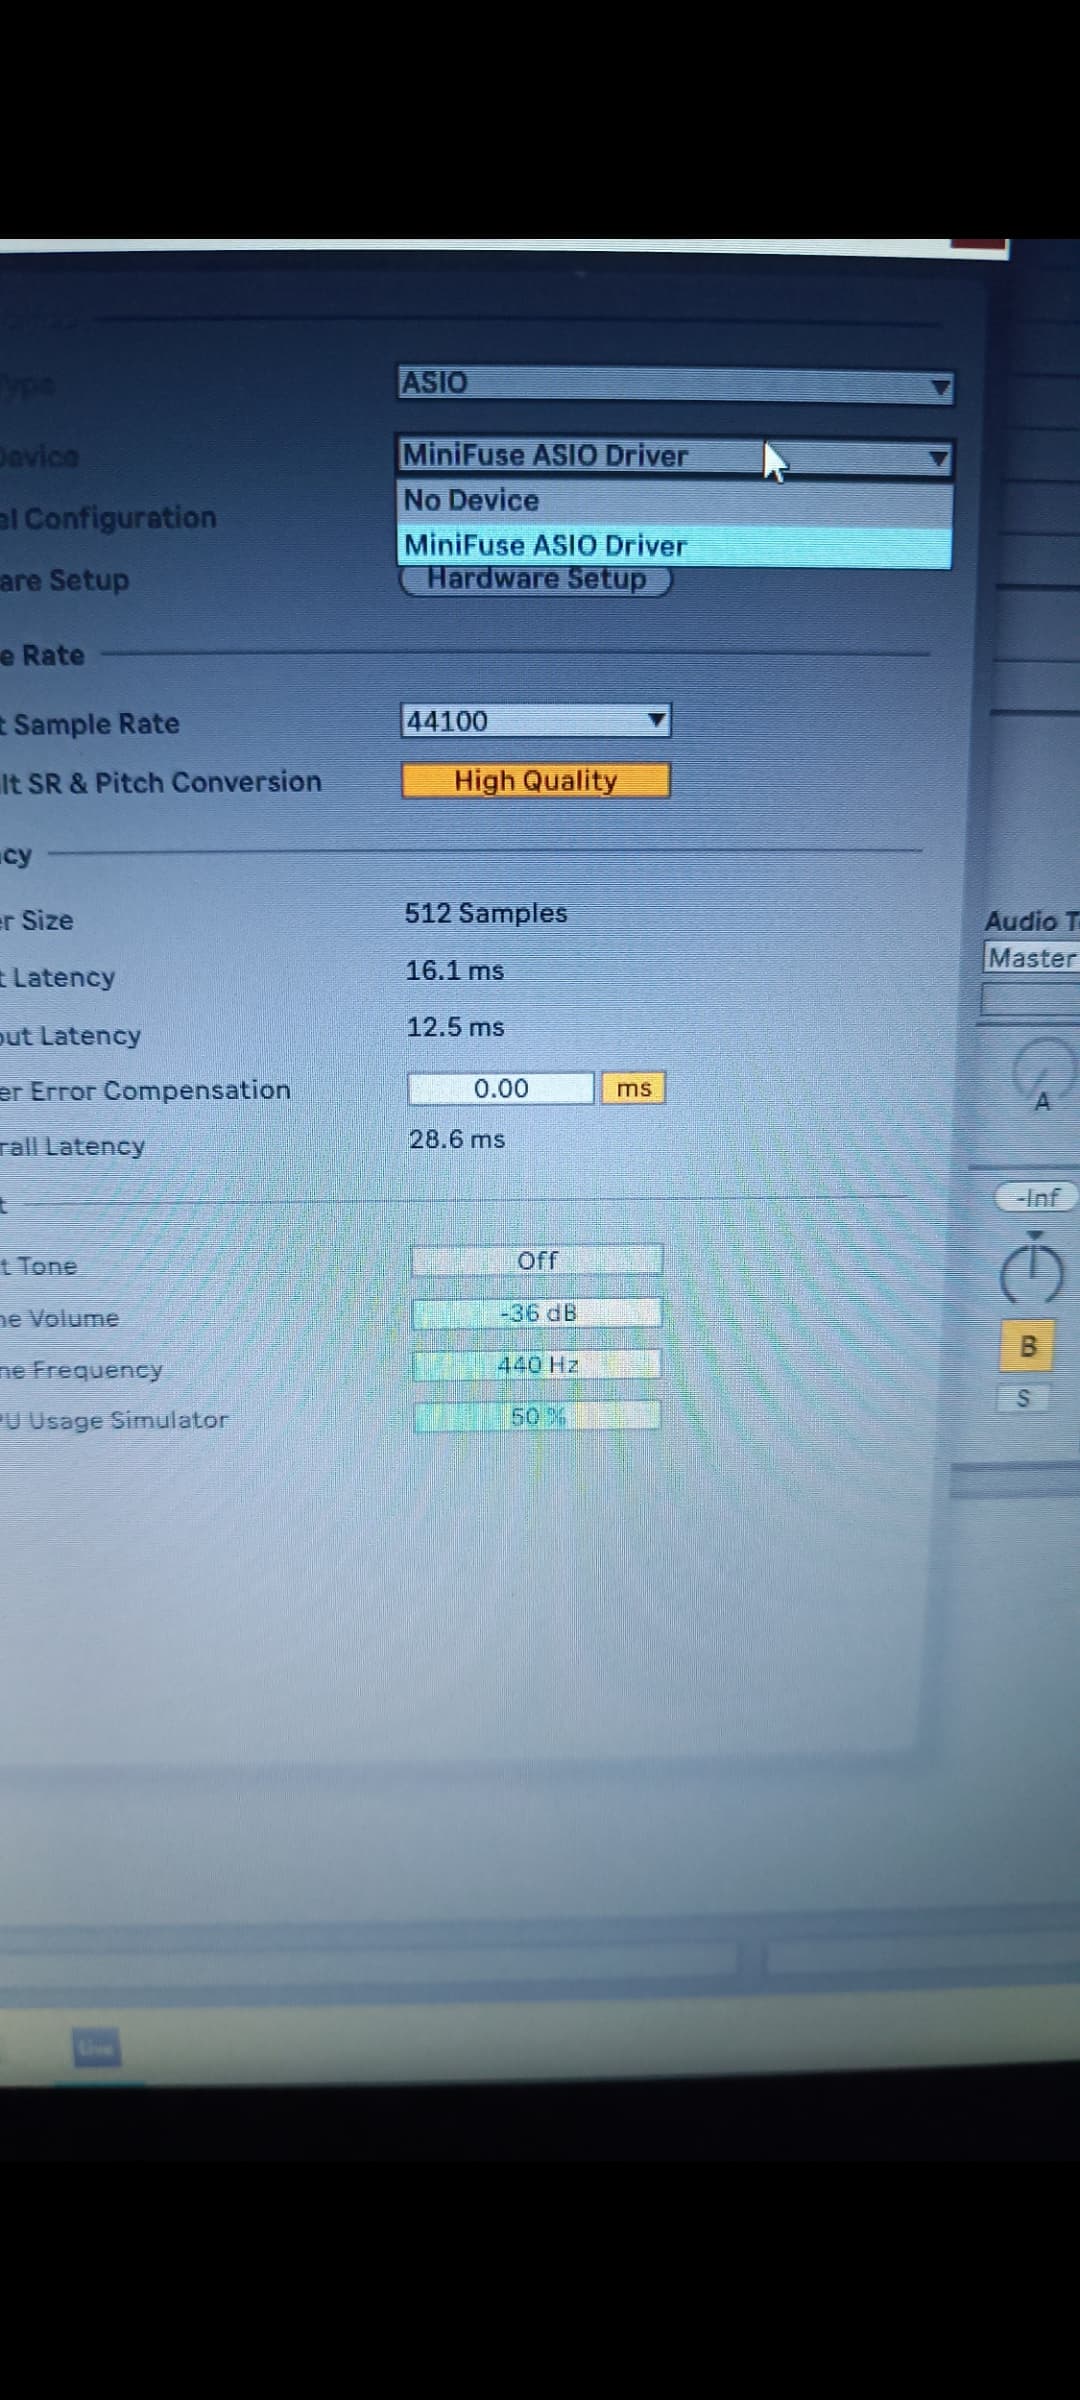
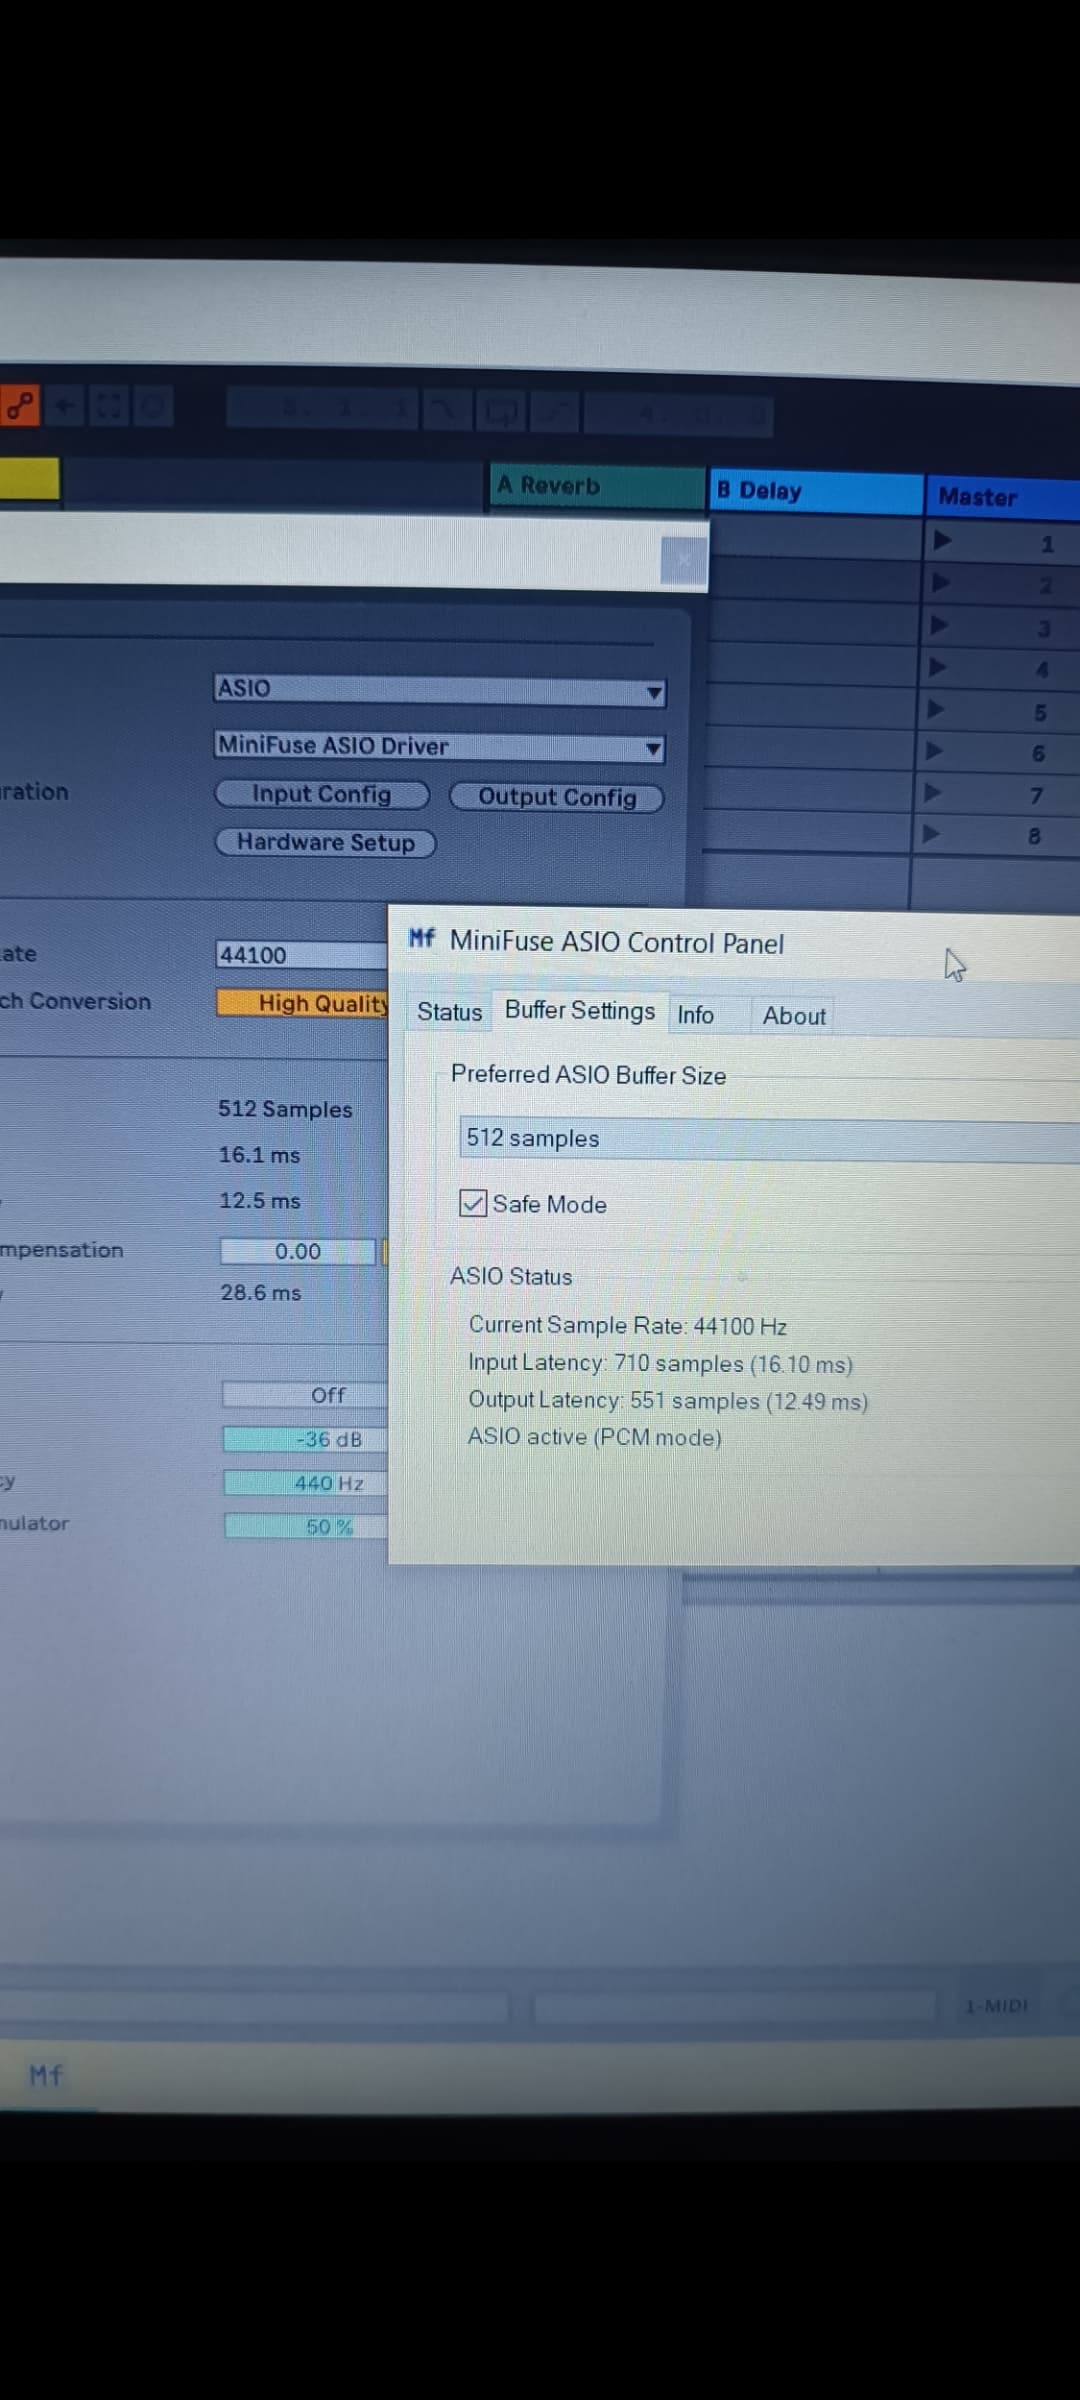
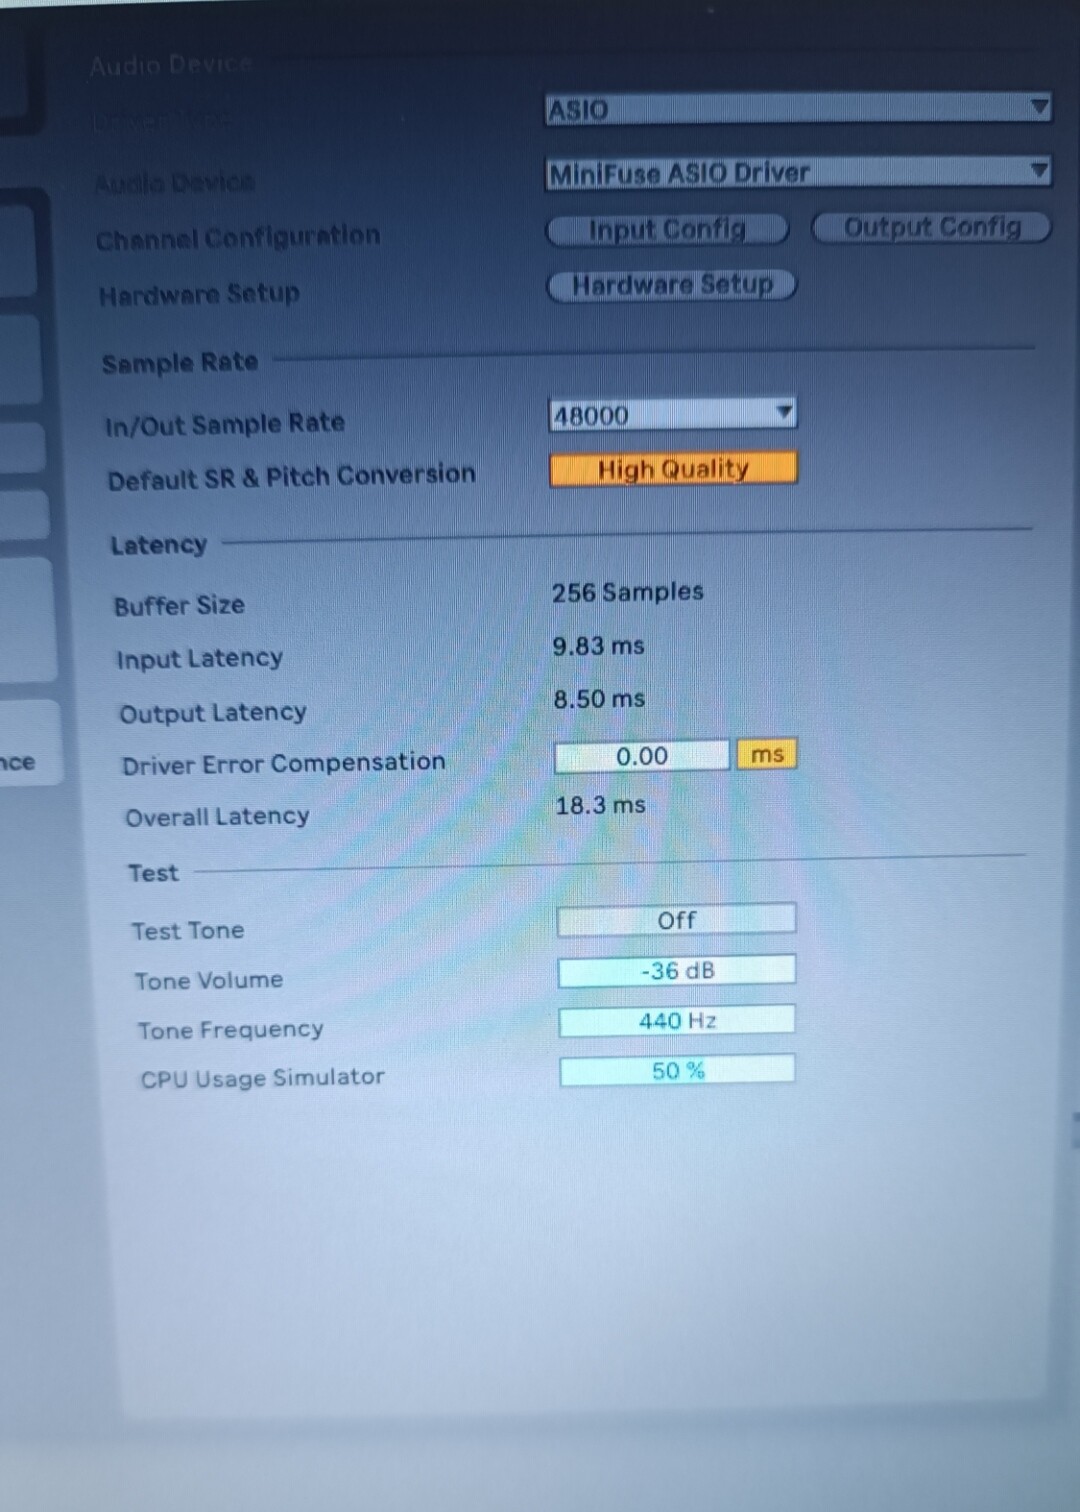
You’ll see from your first pic in the post that the buffer is set to 256 samples, this is the ‘chunk’ of data that your pc will deal with at a time. Out of the figures for latency below that, the Overall Latency is the figure you’re interested in here, that’s how long it will take the audio from your mic to do ‘the round trip’ described above or for you to hear a sound from any virtual synth plugin you might be triggering from your midi keyboard.
Ideally it should be below 10ms (Milliseconds), so i would change this to the lowest value possible and see how your system reacts, you will need to raise the amount if it’s not happy, also in heavier sessions with a lot of plugins running it might be the case that you have to increase it too to allow your computer to handle the increased workload. That’s unlikely to affect you for a little while though.

Sound quality isn’t affected by buffer size unless you have the buffer so low that it causes crackles and pops, sample and bit rate will both affect your sound quality, again this is something you should read up on yourself as it’s quite a large subject and rather too much for a post like this. Again it’s something you’re going to have to have at least some kind of working knowledge of.

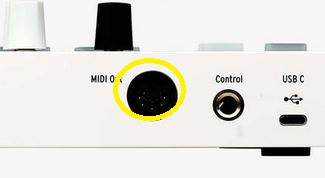
How are you connecting your midi keyboard
are you using ‘Din’ Midi or USB? Din midi is using the ‘five pin Din’ sockets that look like the pic below, circled in yellow


Din midi port
You only need to use one or the other at this stage, let’s try and keep things as simple as possible for you until you’re more familiar with things.

I do not use Ableton myself and have no real knowledge of it, there are some on here that do, but you would be better to hit the Ableton forum for anything related to it.
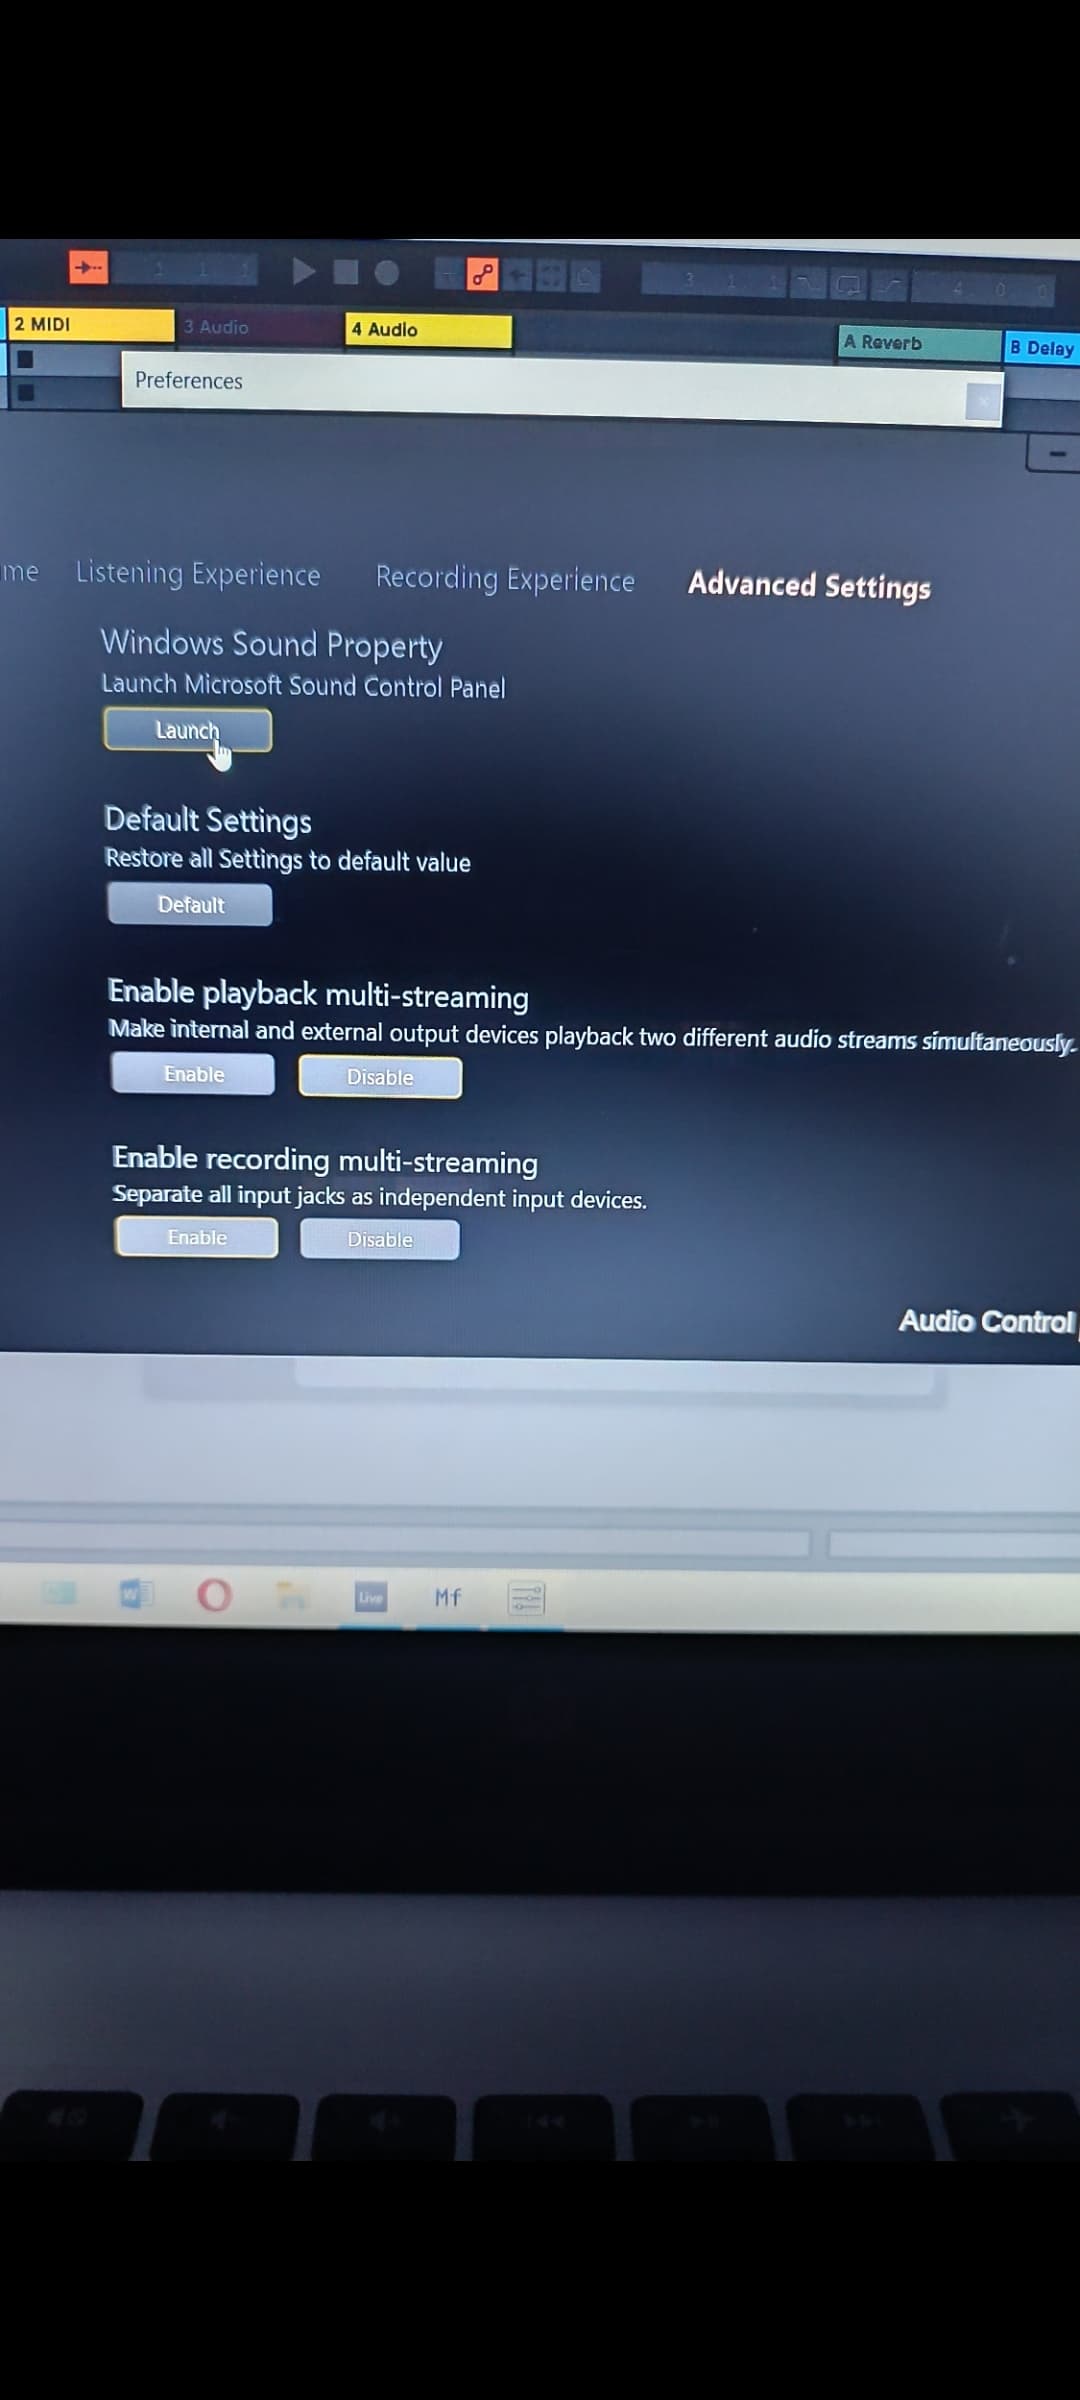
Looking at the pic above this post with the midi connections, i can only assume that the ‘output’ tab should be set to what external instrument, which you don’t have currently, or a virtual instrument/synth such as Arturia AnalogLab or similar. Again you really should use the Ableton forum for how to do this in Ableton as they will be familiar with that particular software of course.

Once you’ve done all that, try loading a virtual synth/keyboard plugin, set the ins/outs the way people on The Ableton forum suggest, and try playing it from your mid keyboard. Make that the first ‘target’ for you to aim for with all of this, approach it in small steps making sure you understand and can repeat each step for now. Once you’re comfortable with it, then move on to something else such as being able to record audio with your mic or from any synth plugin you might have loaded.

These things take time unfortunately but they can be HIGHLY rewarding if we stick with them. It can be frustrating at times, but that only adds to the great feeling you’ll get once it all clicks in place for you.
Pretty much EVERYONE on this forum has been through what you’re doing at some point in their own musical journey too, so you’re in good company.

HTH!

Thank you very much for your kind reply and help.
I am not using midi connection on minilab3, I have it connected to my laptop on the USB port.

Maybe I can help with some of the Ableton-specific parts.

From the screenshots, it looks like you’re using Live 10, or maybe even an earlier version. Official control surface support for MiniLab 3 was only added in Live 11.2.5. That’s why you aren’t seeing it in the list of available Control Surface types. The older MiniLab versions have a different control layout, so I’m not sure what will happen with that selected in the list. Maybe it will work, or just partially work, or maybe it won’t work at all.

If you can upgrade to Live 11 or 12, that will give you the smoothest experience, and you’ll be able to follow the MiniLab 3 setup instructions for Ableton Live as is. MiniLab 3 includes a licence for Ableton Live Lite 11, so that’s one option for getting it.

If you’re stuck with an old version, you’ll still be able to use the MiniLab 3 as a controller, but you might need to manually map the controls if the built-in control surface integration doesn’t work. There are details in the Ableton Live 10 manual in the section called “Manual Control Surface Setup”.

The MiniLab 3 setup instructions I linked to above say to disable the “MiniLab DIN THRU”, “MiniLab MCU” and the “Minilab ALV” ports. You should have “Track” enabled for MiniLab Input. Also turn on “Remote” if you’re planning on manually MIDI mapping the controls to the UI, as described in that “Manual Control Surface” section. Leave Sync turned off—that’s only needed when you’re syncing Ableton to an external MIDI clock.

Takeover Mode is a matter of preference. This is to handle cases when the physical control mapped to a software control isn’t in the matching position. For example, if you’re mapping a fader on the MiniLab 3 to a track volume control and the physical fader is at the bottom of its range while the track volume is at 0, what should happen to the track volume when you move the hardware fader up? It could either jump down to match the position of the hardware (None), move up in the software from 0 to the top of the range (Value Scaling), or do nothing until you reach the position in the hardware corresponding to 0 (Pick-Up). There’s no right or wrong answer, there’s just what you expect and find easiest to use. Again, there are more details in the manual.

The “Start Stop Sync” button has to do with the Ableton Link protocol, which is a way to wirelessly sync the clock between multiple devices and apps. It’s not related to MIDI or setting up the MiniLab 3. If you’re not using other apps with Ableton Link support, you can ignore it (and could even hide the Link toggle by clicking the button above it).

1 Like

Tmoore , thank you so much for your time and help. I will check every detail and info you gave and will be back if I have any other questions.
It means a lot and once again thank you for your time and kind help! :slightly_smiling_face:

1 Like